Template development
Guidance on how to approach template development with the Silverfin CLI
You have all the tools installed, know all the git commands and even the development flow best practices. All that's left is to understand the capabilities of the Silverfin CLI and how you can start creating or updating templates in Silverfin from your local machine.
Before you startMake sure that in the terminal, you are located in the directory of the repository.
1. Authorize with your Silverfin firm
If you always use the same firm ID with your repository, you could store it in the configuration so you don't need to enter it every time you run a command with the CLI. You can configure this:
silverfin config --set-firm <firm-id>To check which firm id is currently stored, run:
silverfin config --get-firmA. If you have a regular admin account:
- Log out from Silverfin in your default browser.
- Run the following command:
silverfin authorizeYou'll be asked to enter the firm id of the firm you want to authorize with.
If you set a default in the config file, you can leave it blank for the CLI to automatically use the default firm.
If you don't know your firm id, you can find it in the URL.
live.getsilverfin.com/f/[firmid]
- A new window or tab will open for you to login to Silverfin.
If this is the first time you set up authentication, you’ll be asked if you want to give the CLI permission to read your data. Click accept to continue. - You will now see a page with an Authorization code for this specific firm id. Copy that code (be mindful of trailing spaces) and paste it in the terminal, where it should now show you: "Enter you API authorization code:"
B. If you have a super user admin account
The steps are largely the same as for A, but the starting point is different.
You need to log in with your super admin account and navigate to the firm you want to authorize.
Then run the silverfin authorizecommand and follow the steps as described above.
Help me!With the Silverfin CLI you will get access to different functionalities, from managing reconciliations, to running liquid tests, and setting default configuration. You can always get an overview of all the commands available by running
silverfin --help
2. Strict repository structure
It's mandatory to follow the below structure in your repository.
Don't worry about it too much though, as creating or importing templates from Silverfin will automatically create the necessary (sub)directories and files.
/repository_name
    /reconciliation_texts
        /[handle]
            /tests
                README.md
                [handle]_liquid_test.yml
            /text_parts
                part_1.liquid
                part_2.liquid
                ...
            main.liquid
            config.json
    /shared_parts
        /[name]
            [name].liquid
            config.json
    /account_templates
        /[name]
            /text_parts
                part_1.liquid
                part_2.liquid
            main.liquid
            config.json
    /permanent_texts
        /[name].liquid
    /export_files
        /[name]
            /text_parts
                part_1.liquid
                part_2.liquid
            main.liquid
config.json-
Repositories are structured according to template type.
Currently there are folders for /reconciliation_texts, /shared_parts, /permanent_texts and /export_files
e.g. be_market/reconciliation_texts/ -
Every template is stored in a folder, using the handle as name
e.g. be_market/reconciliation_texts/btw_saldo/ -
For every template the Liquid tests are stored in a separate folder /tests
e.g. nl_market/reconciliation_texts/insights_v01/tests/ -
The Liquid test YAML file should be named using the following convention: [handle]_liquid_test.yml
-
main.liquid contains the code in the part “main”
-
in the folder /text_parts you’ll find a .liquid file for every local part in that template
-
config.json stores information about the template
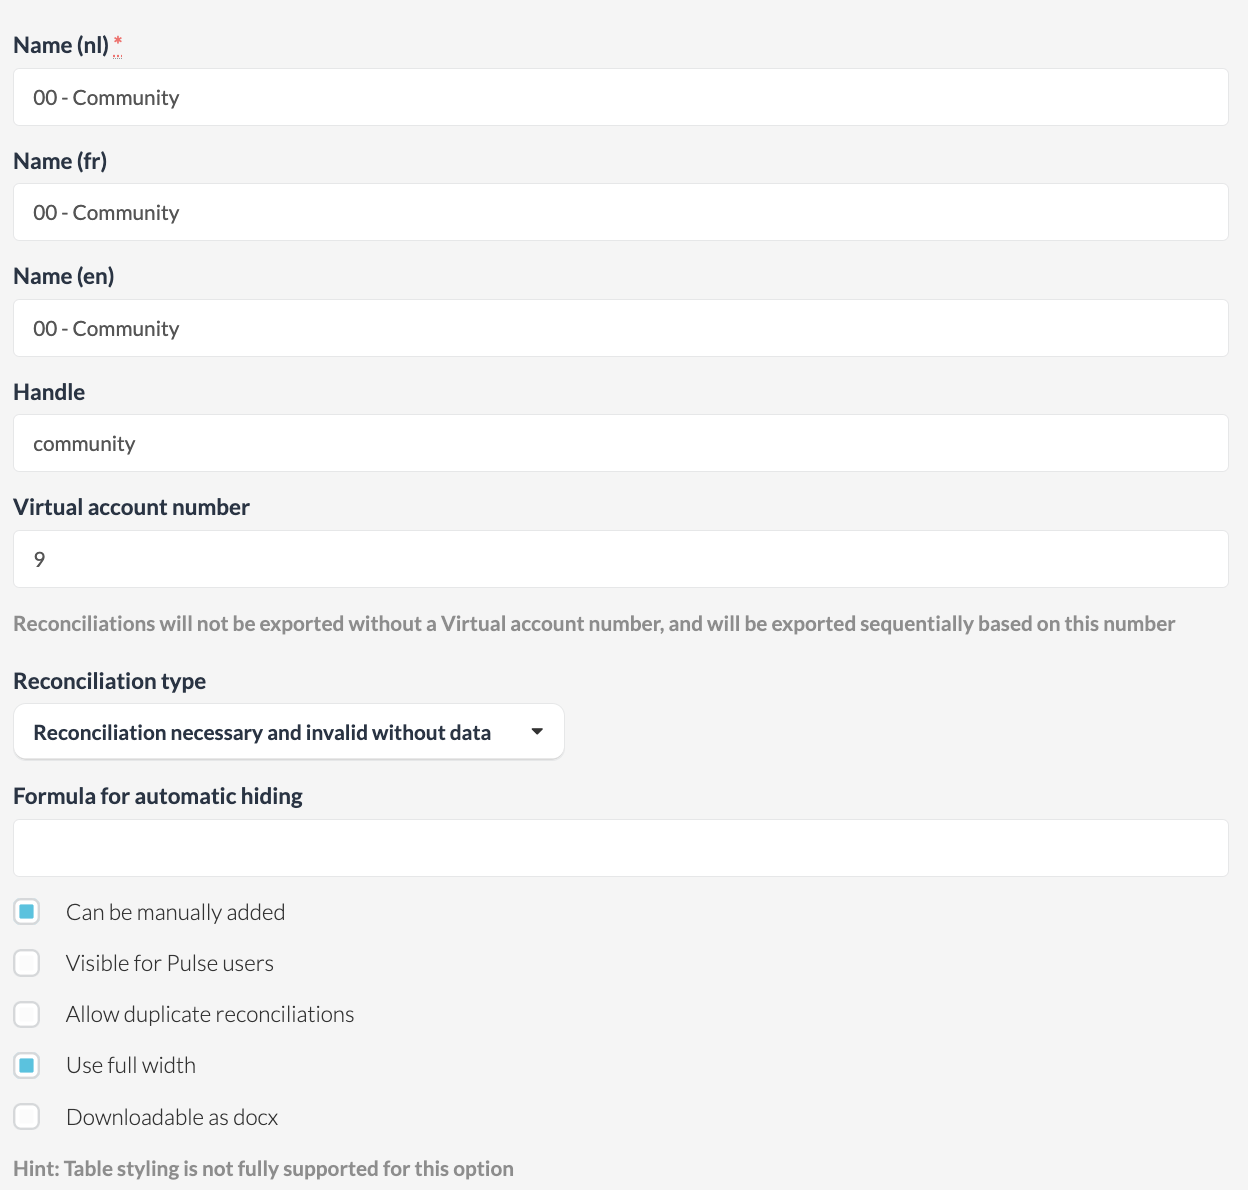
- All the information you can also set on the platform
- Information about the (shared) parts structure, for which it also stores the id of the specific template or part for every firm
The id corresponds to what you see in the URL when you edit a template on firm level.
live.getsilverfin.com/f/[firm id]/reconciliation_texts/[reconciliation id]/edit
Importing a template from Silverfin will automatically create all the files related to that template, including the config.json.
For example, this is what the config for a shared part looks like that has been used in multiple firms.
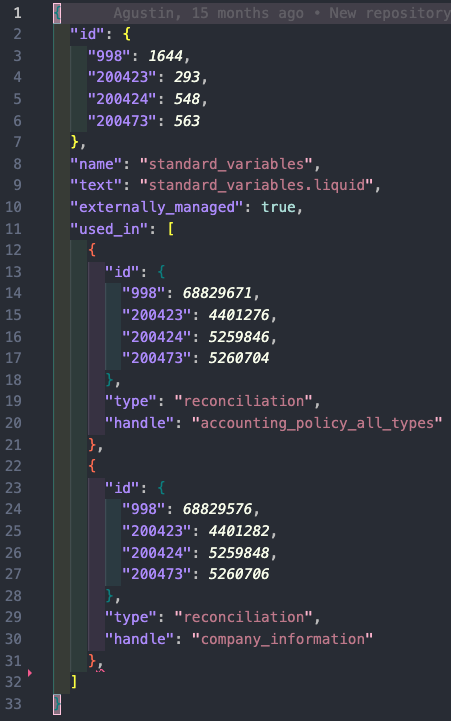
You can see that the shared part itself has a different id for each of the firms. E.g. in firm 988 the id is 1644.
You can also see in which templates the shared part has been used. In firm 988 it has been used in the template with handle accounting_policy_all_types with id 68829576.
- Using the CLI will also add and automatically update the parameter "externally_managed".
This new parameter is used to indicate that the template code has been updated through the CLI and is likely managed outside of the Platform. When the parameter is set to "true", it will no longer be possible to make changes to the code of the template on the platform. This to help you maintain a single source of truth in your codebase.
Naming conventionsBecause handles and, in some cases, template names are used as directory names, it's important you stick to strict naming conventions. Avoid special symbols as much as possible, especially forward slashes as the system will think you want to add another subdirectory.
3. Import from Silverfin
Importing code that's currently stored on Silverfin can be very useful.
If you're currently working on Silverfin and want to start using the liquid toolchain, the easiest way forward is to import everything to an empty repository. You can also import templates on a template by template basis.
Make sure you're inside the repository in the terminal and that you've authorized the firm you wish to import the templates from.
- Get all reconciliations from Silverfin
silverfin import-reconciliation --all --yesIf you don't want all the reconciliations, you can specify them by handle.
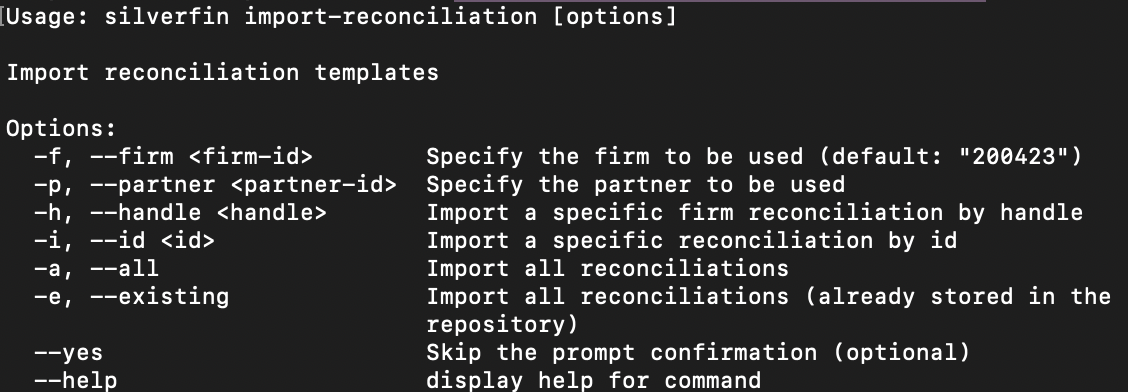
silverfin import-reconciliation --handle <template_handle>If you want to get an idea of the possibilities for each specific command, you can again add the --helpcommand.
For example:silverfin import-reconciliation --help
- Get all shared parts from Silverfin
silverfin import-shared-part --all --yesOr import a specific shared part:
silverfin import-shared-part --shared-part <name>Depending on what else you want to import, there's also:
import-export-fileimport-account-template
The --helpwill guide you whenever you're unsure which arguments you need to add to a specific command.
UpdateWe still regularly update our tooling, so whenever you run a command our CLI will inform you if it's time to run an update.
Run
silverfin updatein the terminal.
4. Create new templates in Silverfin
There are also specific commands to create a new template from scratch, or, to create the templates that sit in your local repository in a specific firm in Silverfin.
Make sure you're inside the repository in the terminal and that you've authorized the firm you wish to create the templates in.
- Create all reconciliations from your local repository in Silverfin. Duplicates are automatically skipped.
silverfin create-reconciliation --all- (optional) If the firm you're creating the templates in is not empty, and may already contain some of them, you need to fetch their ids.
silverfin get-reconciliation-id --all --yes- Create all shared parts from the local repository in Silverfin. Duplicates are automatically skipped.
silverfin create-shared-part --all- (optional) Fetch the ids of preexisting shared parts.
silverfin get-shared-part-id --all --yesDo the same for export files and account templates if applicable.
- Now we still need to establish a connection between the shared parts and the templates for this firm. For this purpose, we've created the command
add-shared-part
silverfin add-shared-part --all --yes5. Developing with the Liquid Toolchain
We've implemented some nifty things that will aid you while coding templates for the Silverfin Platform. With our very own extension you can count on a lot of help while coding. Most of the things you can do with the CLI through the command line also exist in the extension, in case you prefer using the UI instead of typing and possibly memorizing all the commands.
5.1 Development mode
Development mode will send your liquid code to the specified firm on Silverfin every time you save a file. This can be very helpful if you're working on styling and want to see the effects of your code immediately.
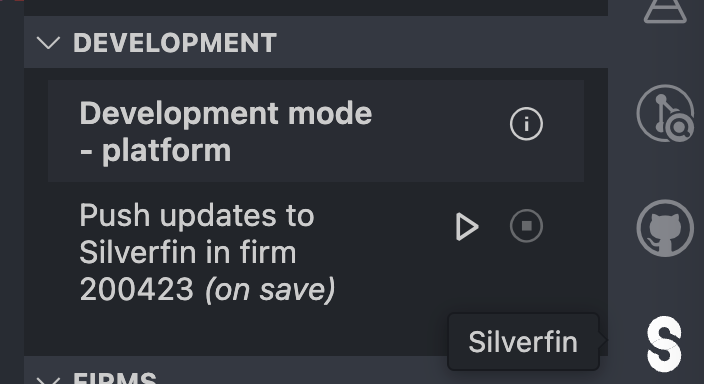
You can also activate development mode from the terminal.
silverfin development-mode --update-templates
ℹ Firm ID to be used: <default firm id>                                                                            1:25:28 PM
This will overwrite existing templates. Do you want to proceed? (y/n): y
ℹ Watching for changes in all liquid files to publish their updates...                                  1:25:33 PM

 WARN  Don't forget to terminate this process when you don't need it anymore! (Ctrl + C)
5.2 Suggestions and warnings
The ace editor on the Silverfin platform will flag any invalid syntax being used, and it will also autocomplete most of the liquid tags for you when you hit the tab key. With our extension we're able to cover even more scenarios. Since we manage our own tooling here, we're committed to keep adding improvements that benefit template developers. Below we'll highlight a few new features that aren't available in the ace editor on the platform.
A. Drops
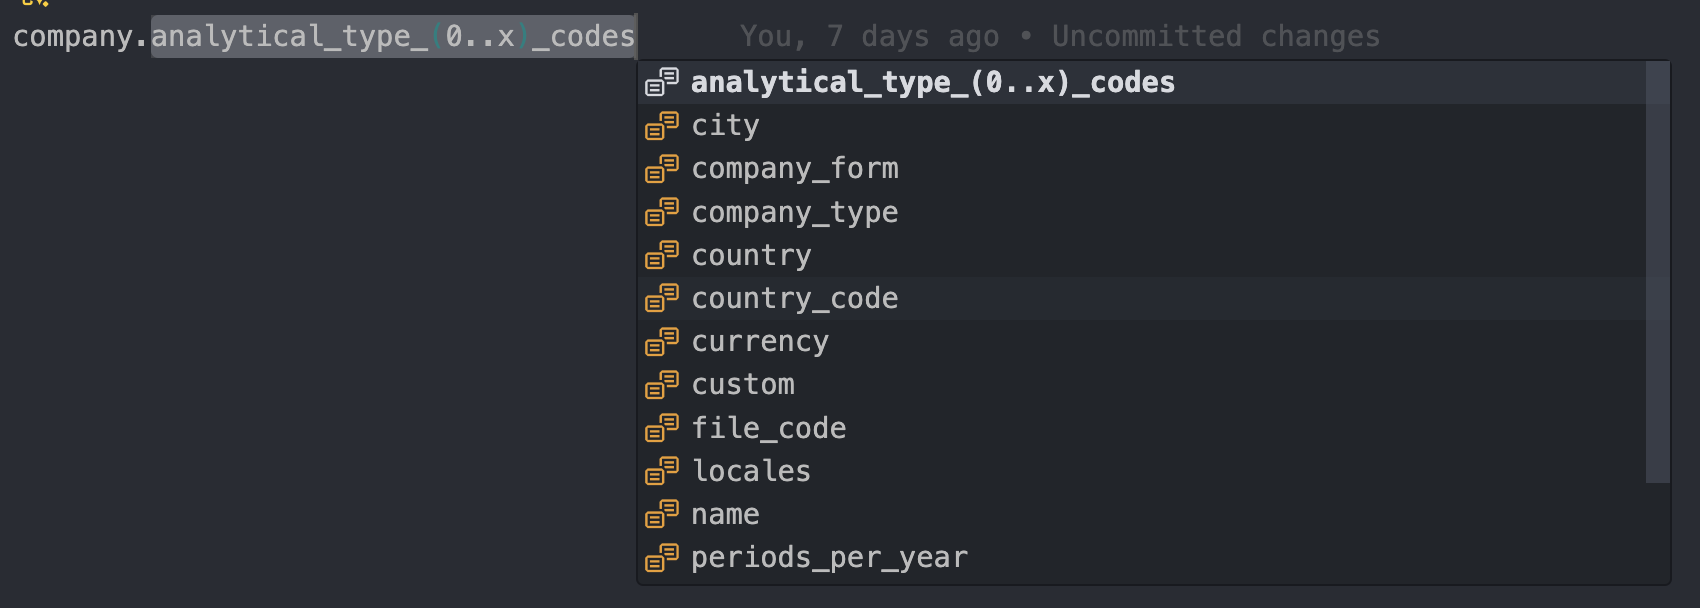
It's impossible to remember all the methods you can call upon the available drops, and now you can get suggestions while coding instead of having to rely on this website solely.

If you type e.g. company.and then press enter, you'll get a list of suggestions that you can cycle through with the arrow keys:
B. Parts and shared parts
Not only can you add or remove parts easily in the extension, you'll now also get warnings when you're including parts that don't exist.
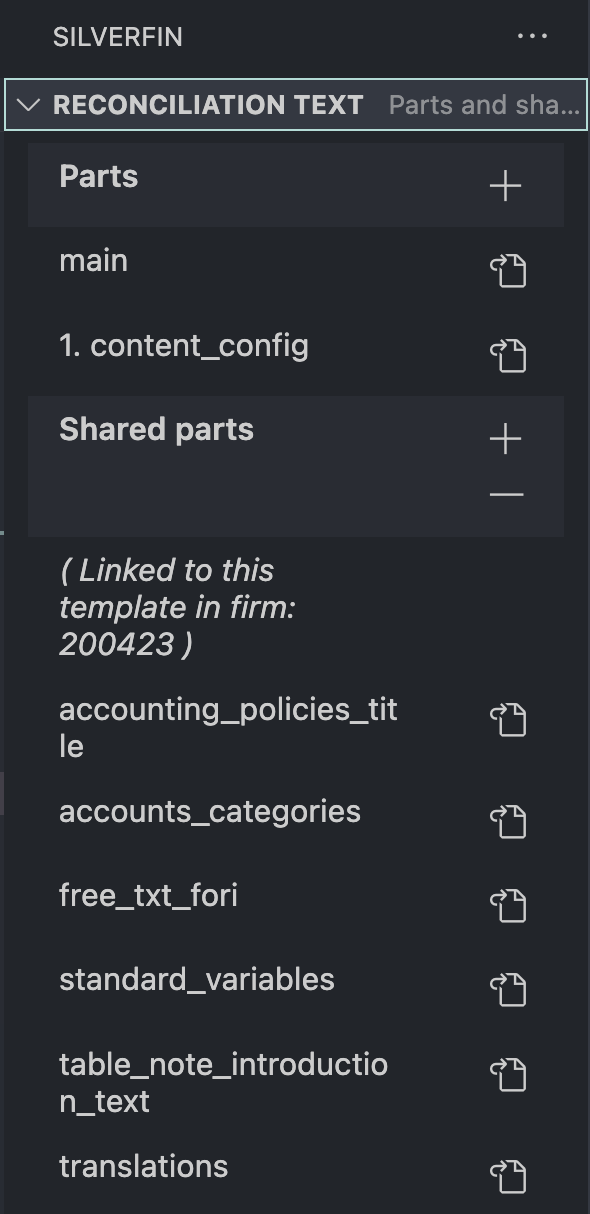

The quick fix option will quickly solve the issue for you.
C. Snippets
Autocompleting snippets are super handy, and one benefit of using Visual Studio Code is that you can also add your very own snippets locally. For example our translation definition assumes you want to add Dutch, French and English translations. But what if you don't need those? A quick google search and you'll learn all about how to add your own snippets to VSCode.
,
	"Translation definition": {
        "prefix": "t=",
        "body": [
            "{% t= \"$1_t\" default:\"$2\" pt:\"$3\" %}"
        ],
        "description": "Inserts a Liquid translation definition with placeholders for portuguese and default"
    },
Updated 10 months ago